
How to change your internal switch components, into your new switch housings
A step by step guide to enable you to swap over your internal switch components into your new switch housings
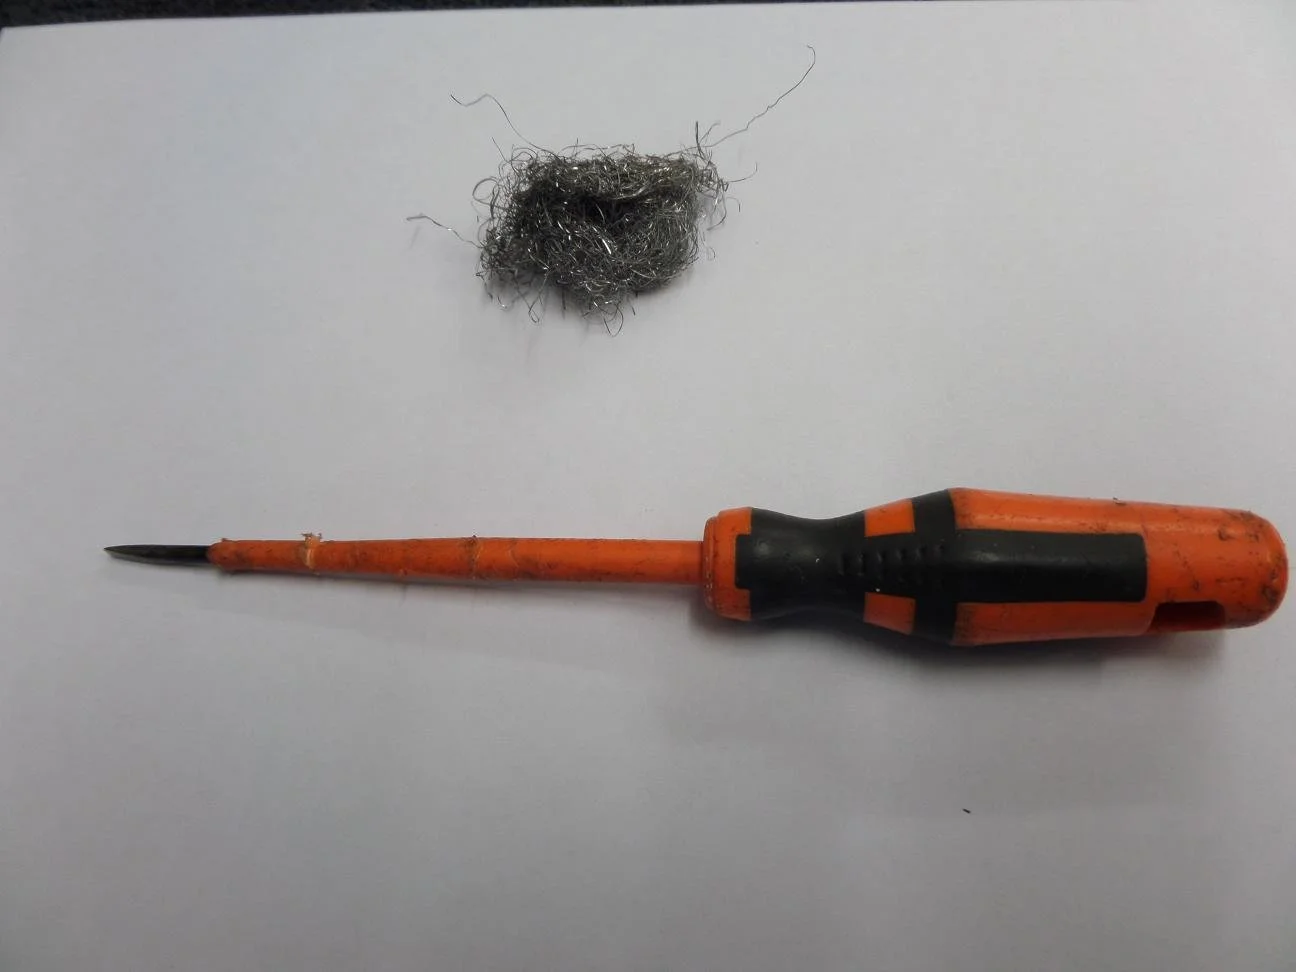

Time to grab a couple of tools
a. Wire wool to clean your connectors.
b. Small electrical screw driver to remove the back electrical connector.
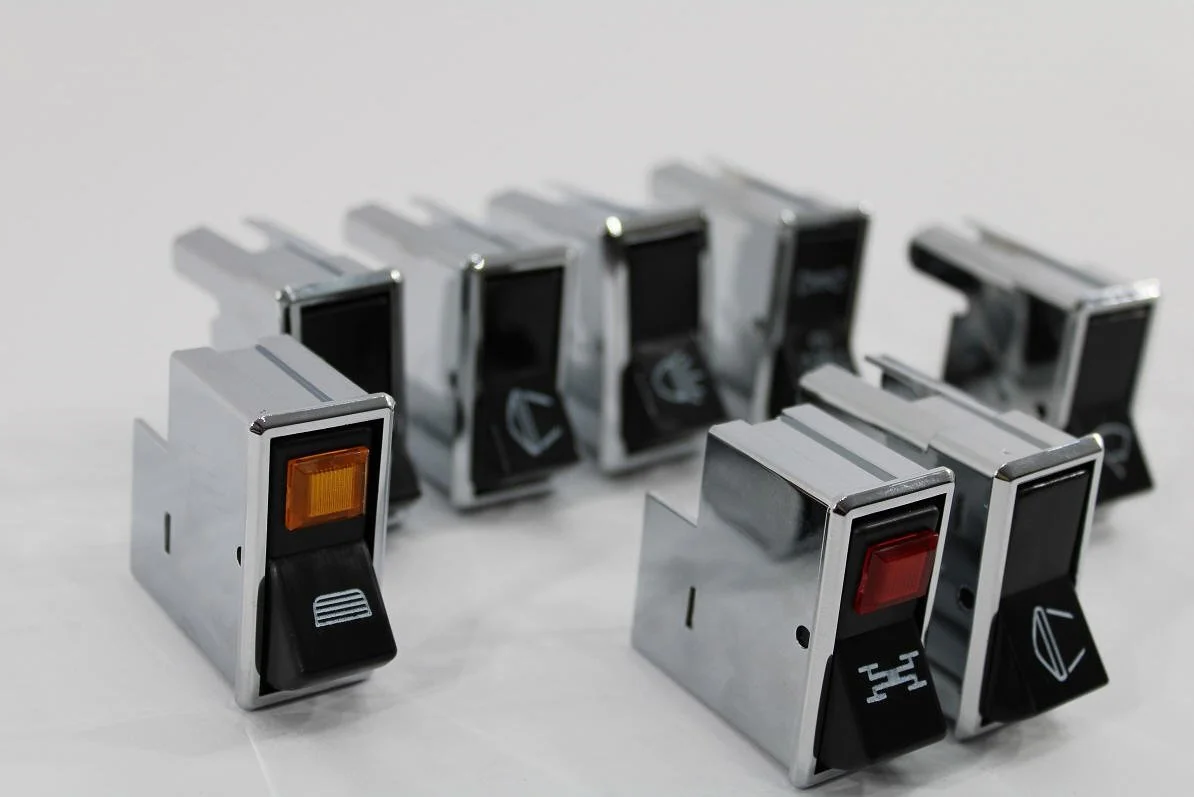
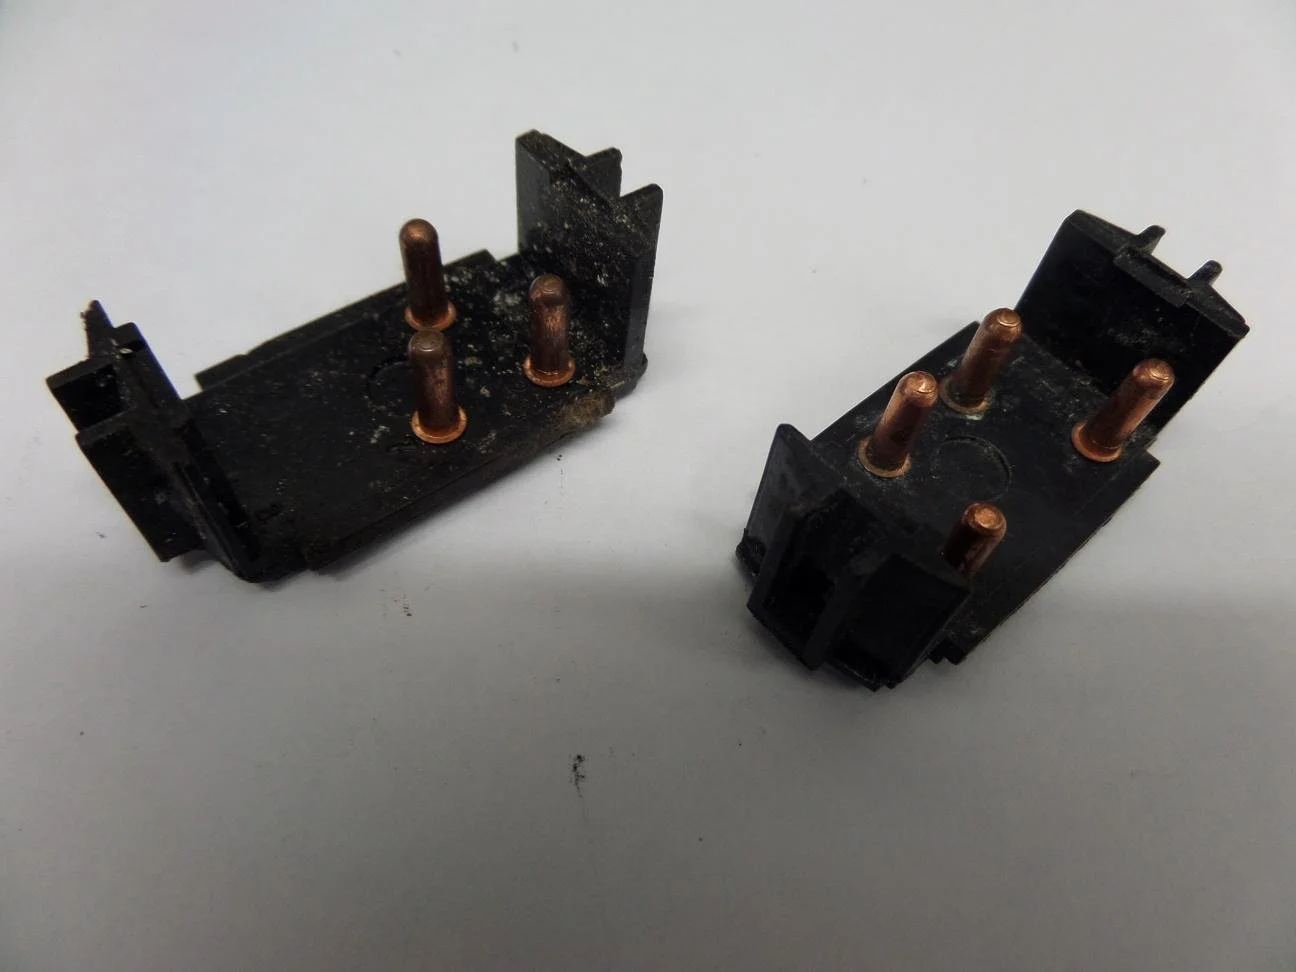
Once your old switch has been removed from your loom, lay both switches out on the table ready to swap components, like below
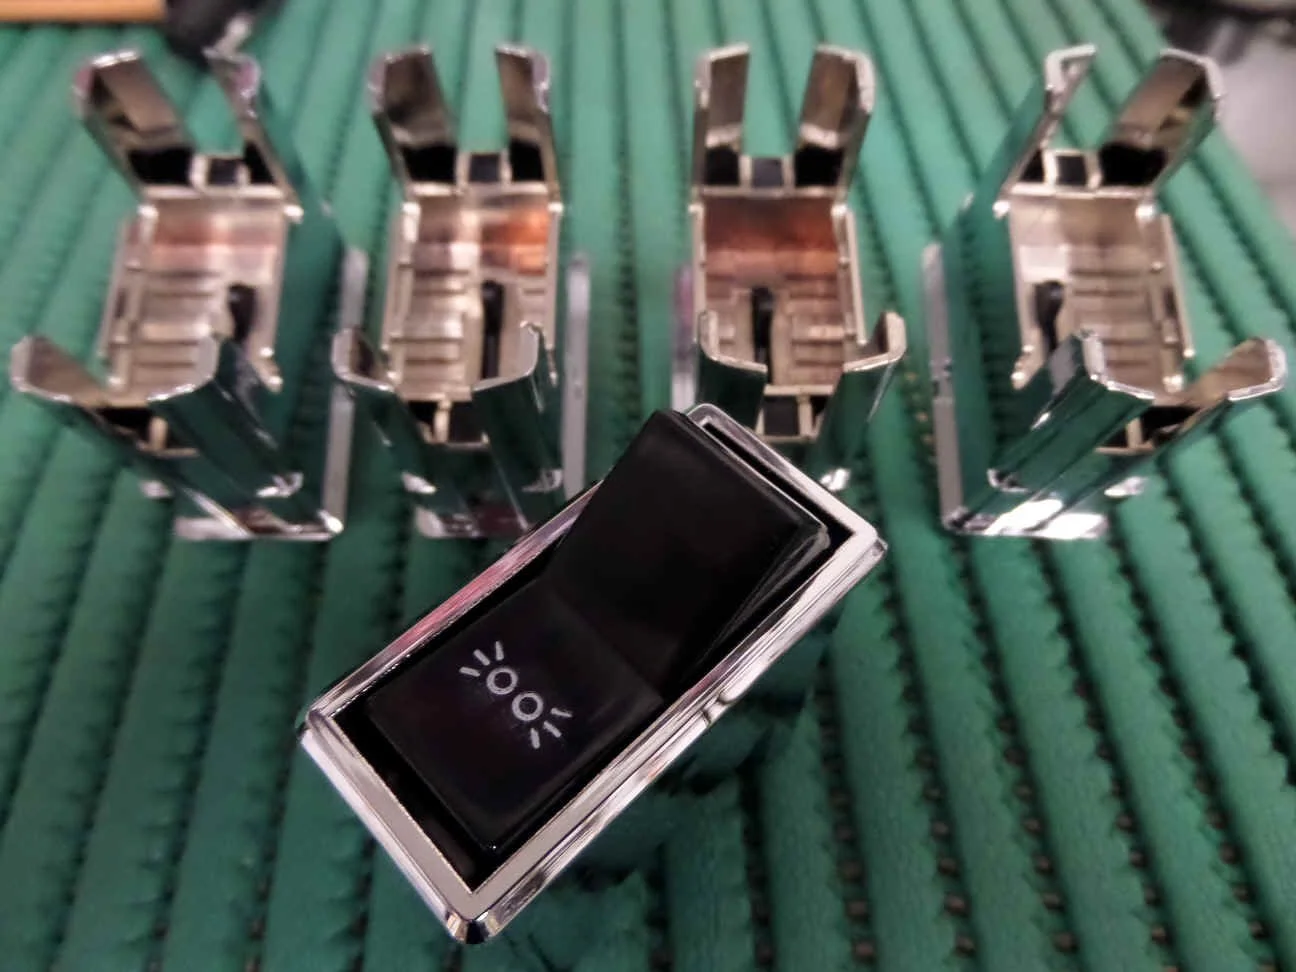
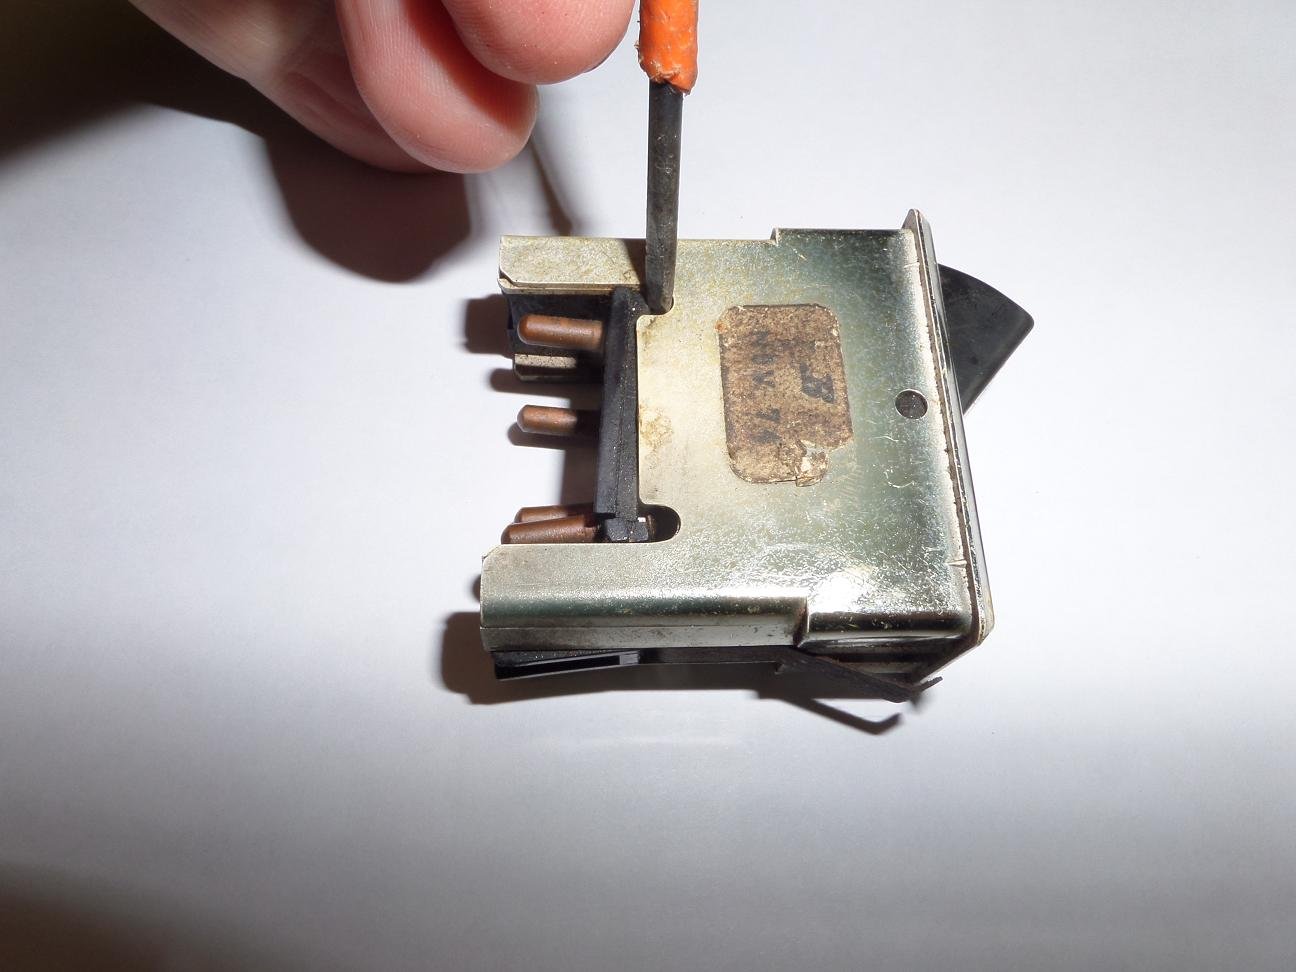
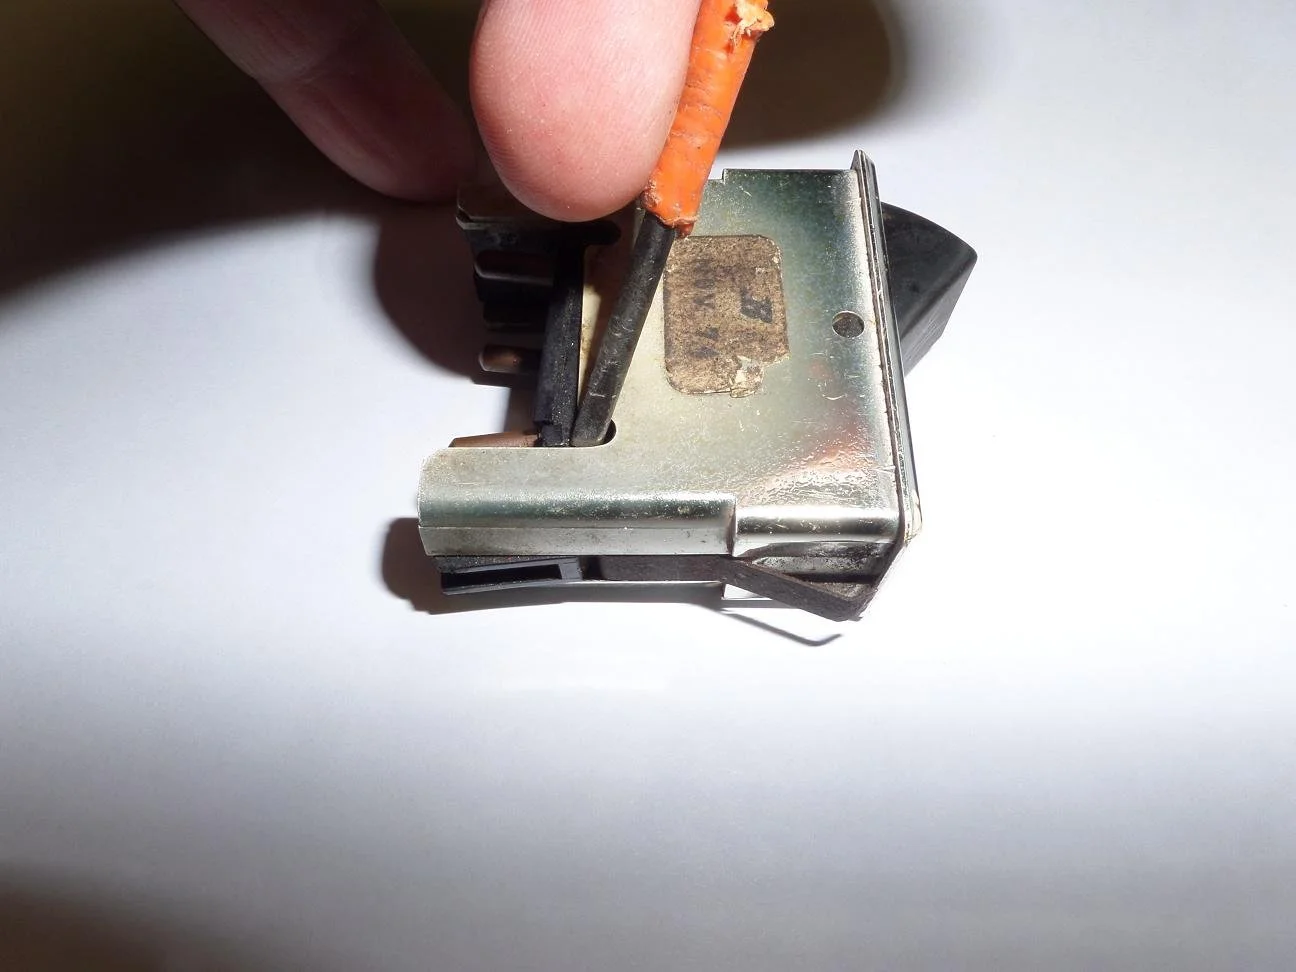
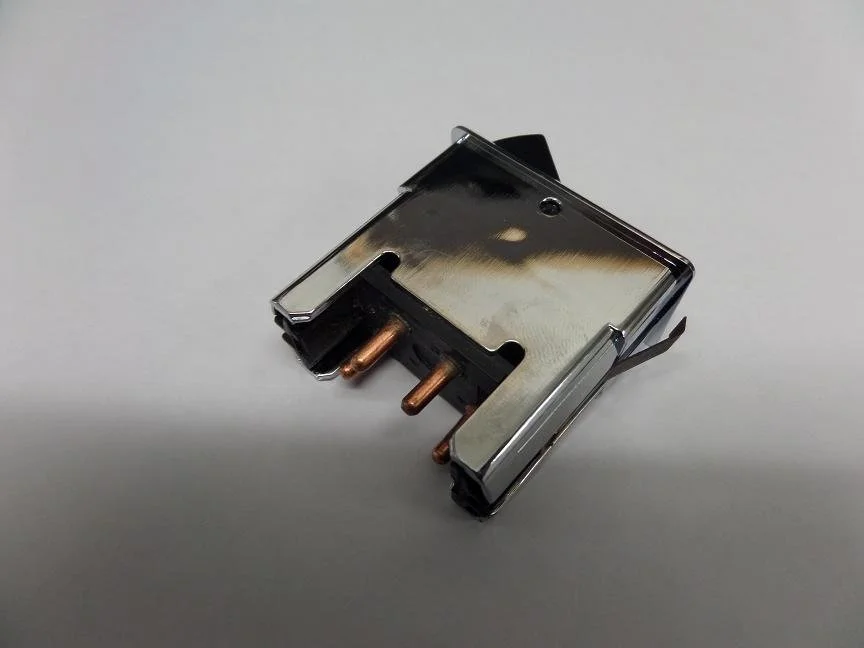
Lay your old switch out on the table and applying lite pressure from behind the connectors taking care not to damage the black connector
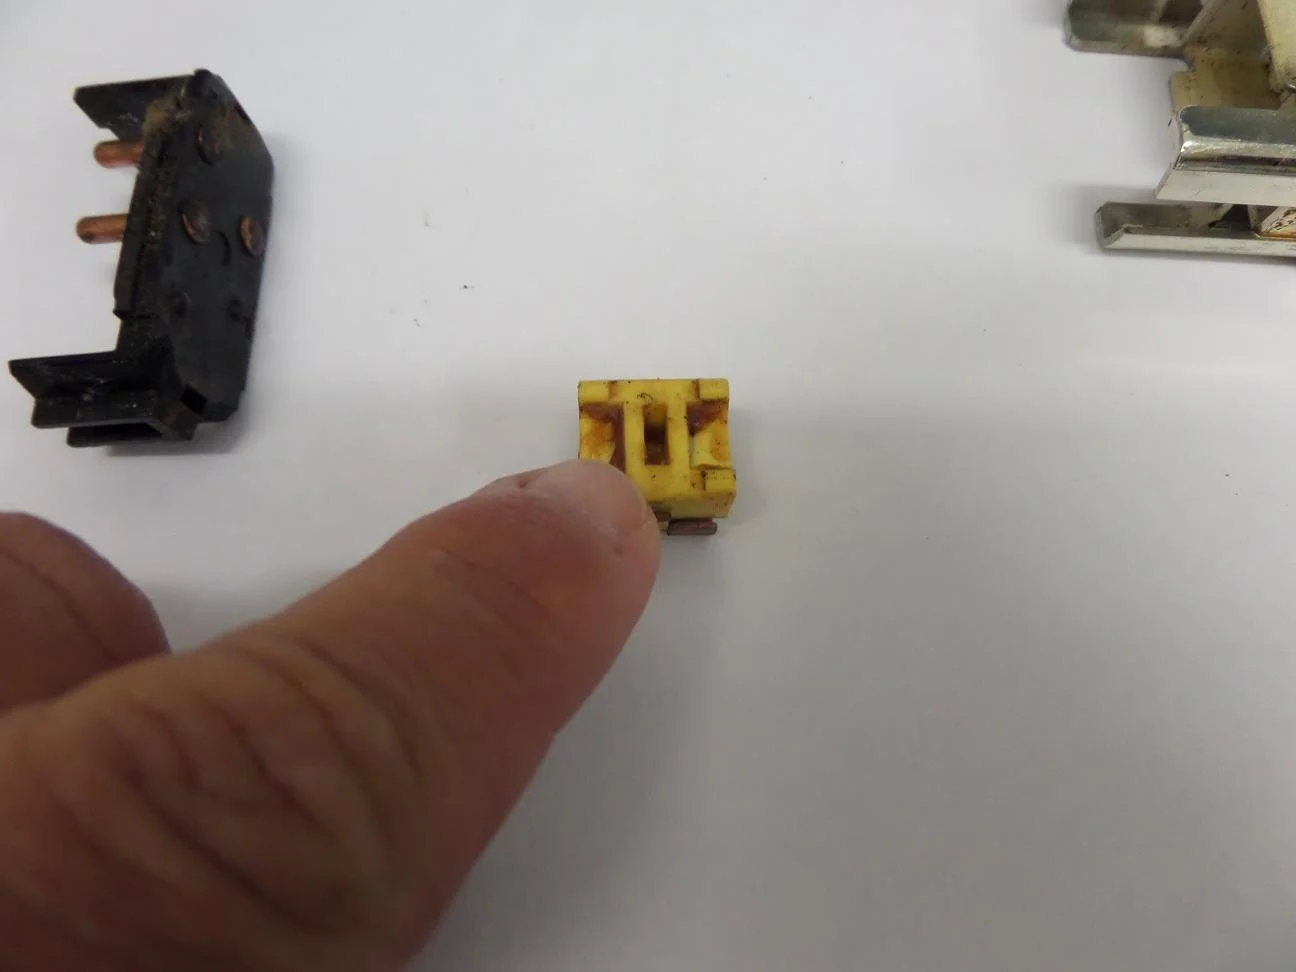
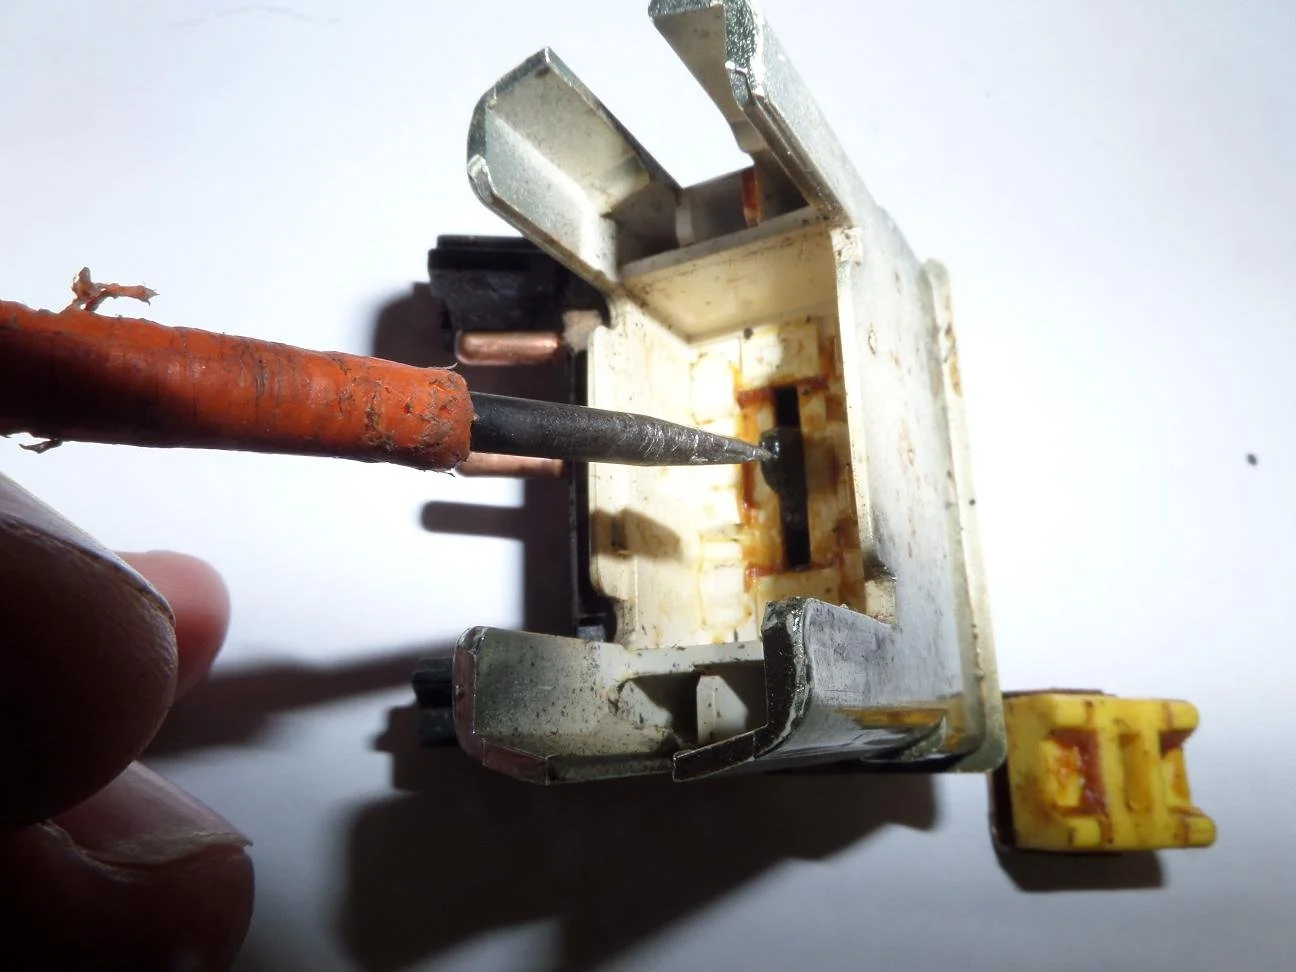
separate the connector from the switch housing taking care as there is a spring connector behind built into a yellow or white block
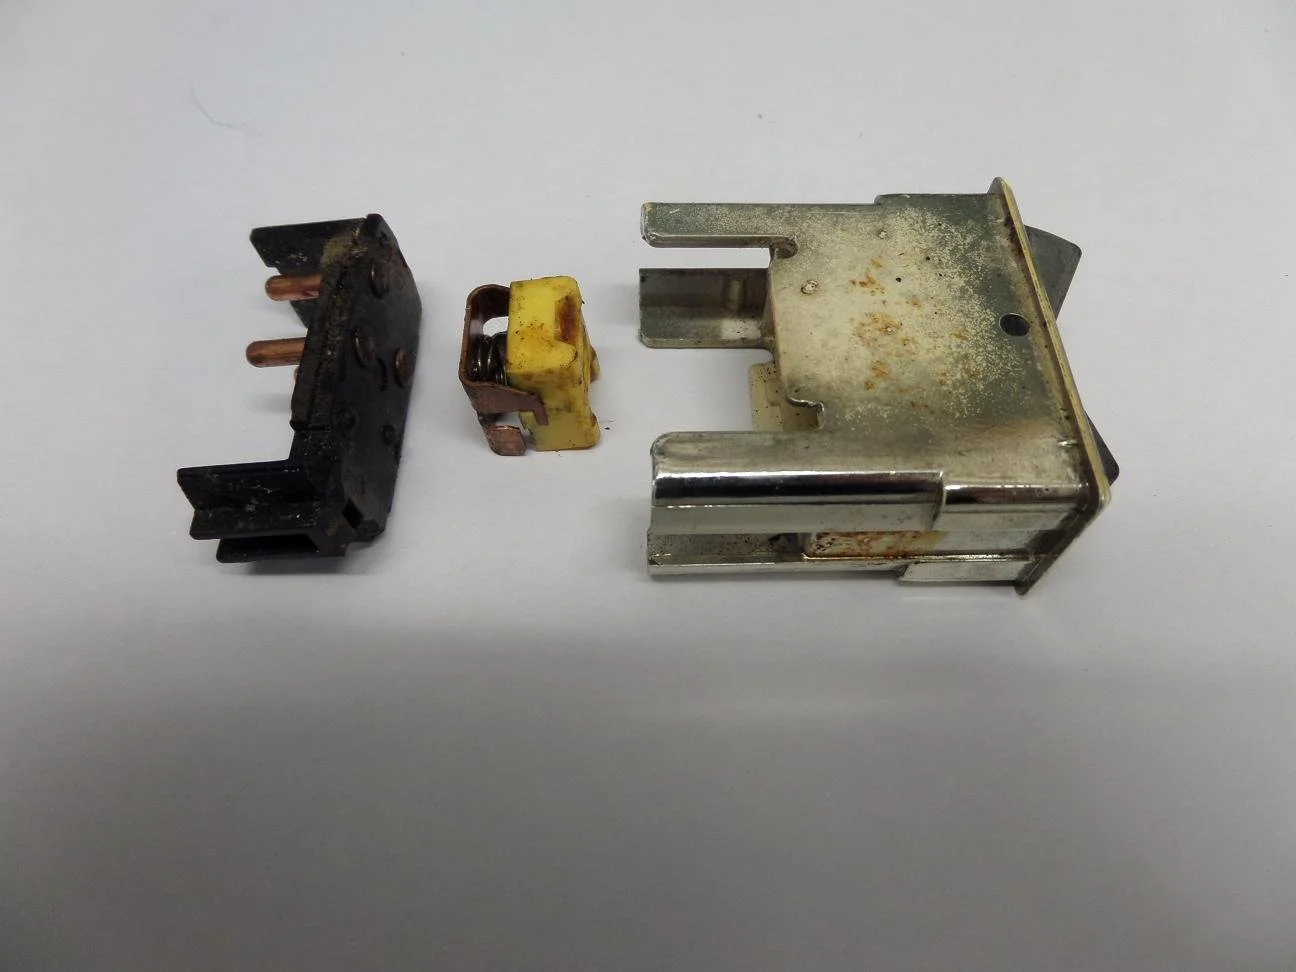
Now lay all of your components out on the table so you know how they go back, pay attention to the position of the slot on the little yellow spring connector pic 2 as the slot aligns with the
black rocker in pic 3 below
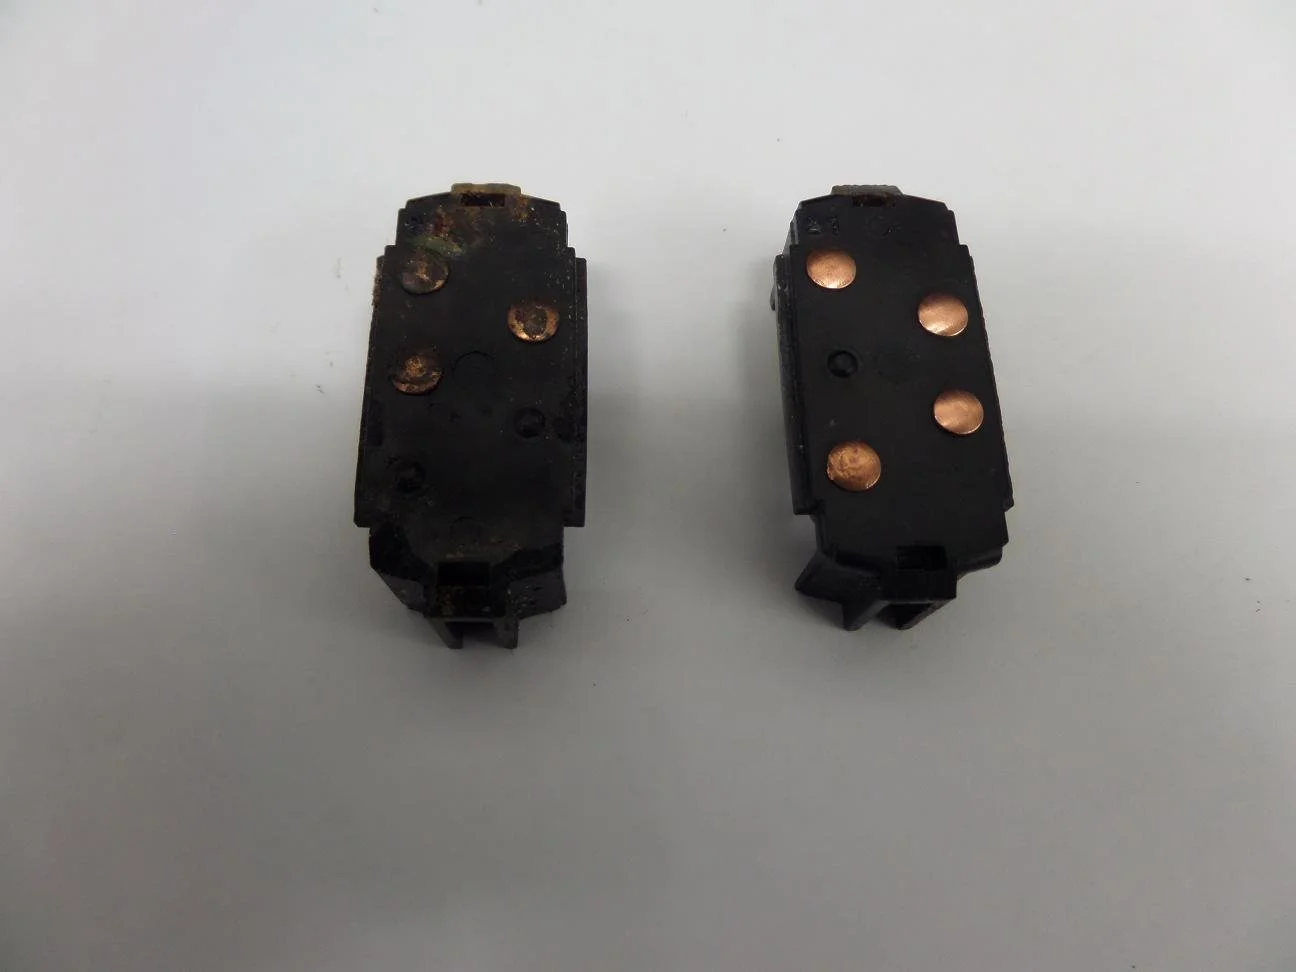
Now take some time cleaning the electrical connectors so they look like this - wire wool is superb for this, ensure you do both sides to finish the job
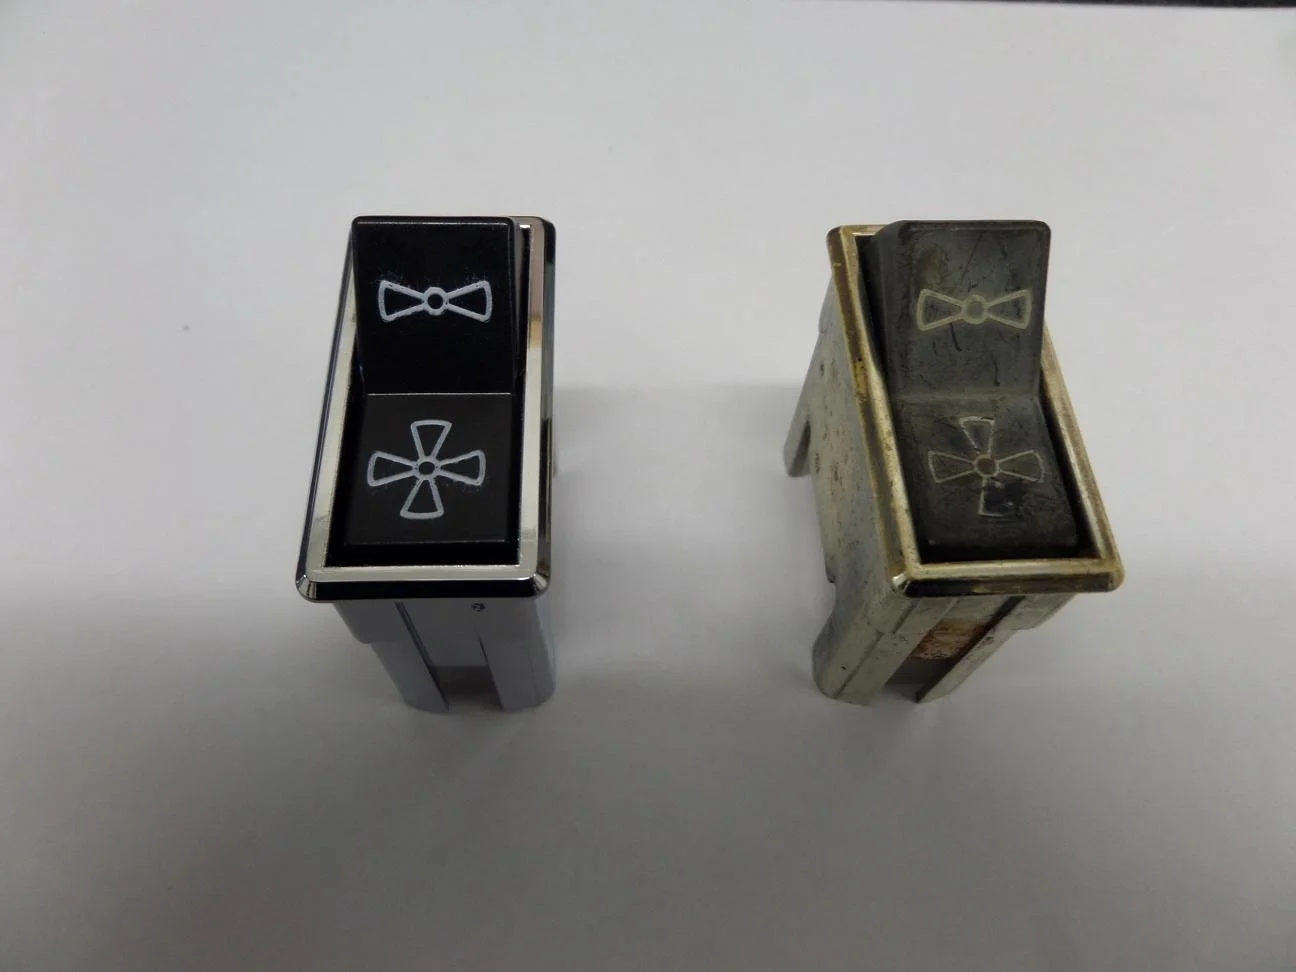
Also take time to clean the side spring clips prior to refitting
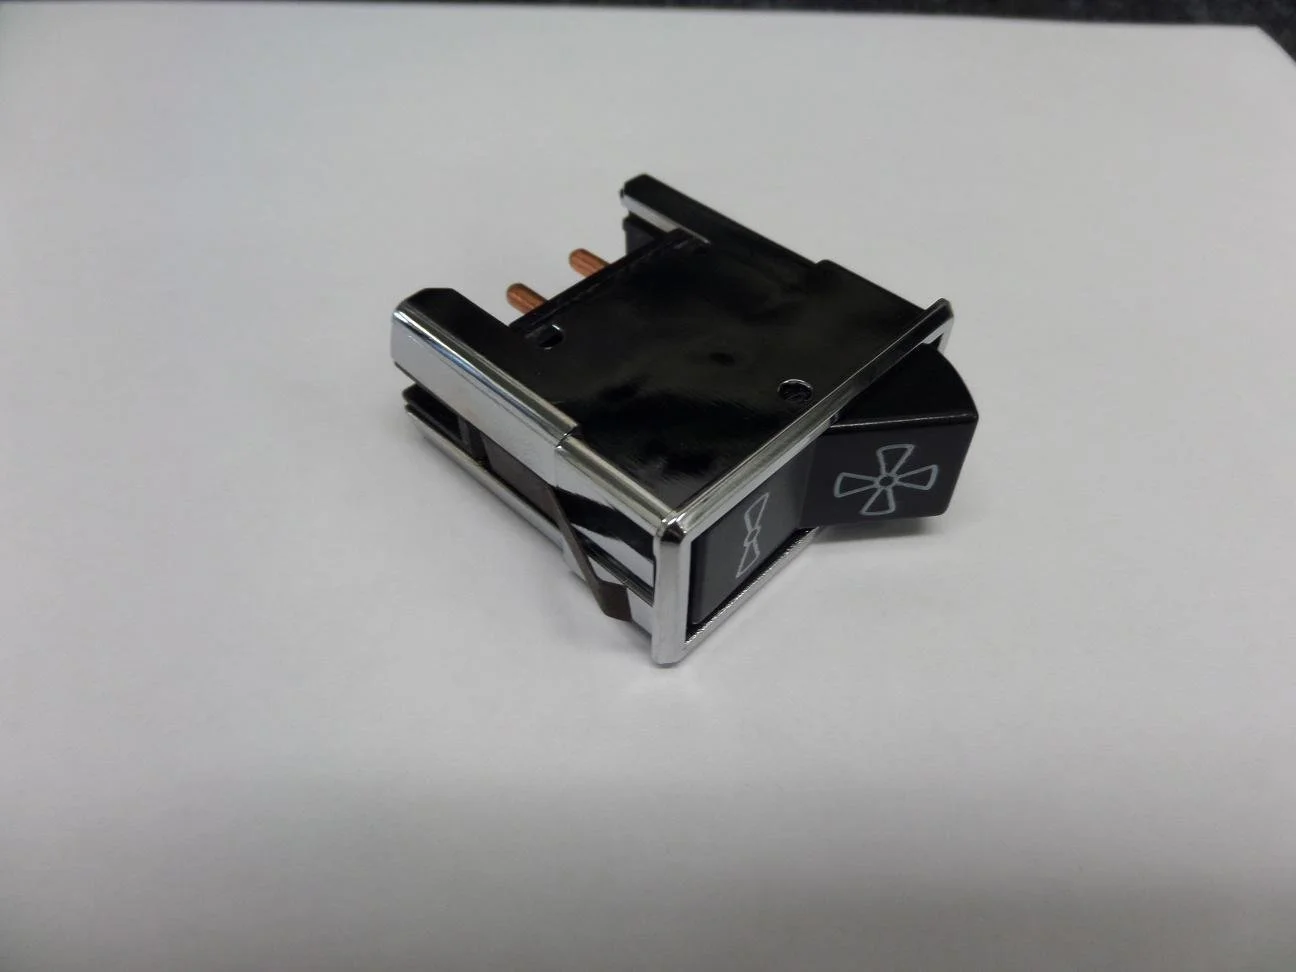
Re-assemble the switch in reverse order so it looks like this with the side retaining clips in place
Once you have completed all of the switches, refit the, back onto your loom